Showing posts with label how to. Show all posts

Tuesday, July 24, 2012

Cupcake Bouquet


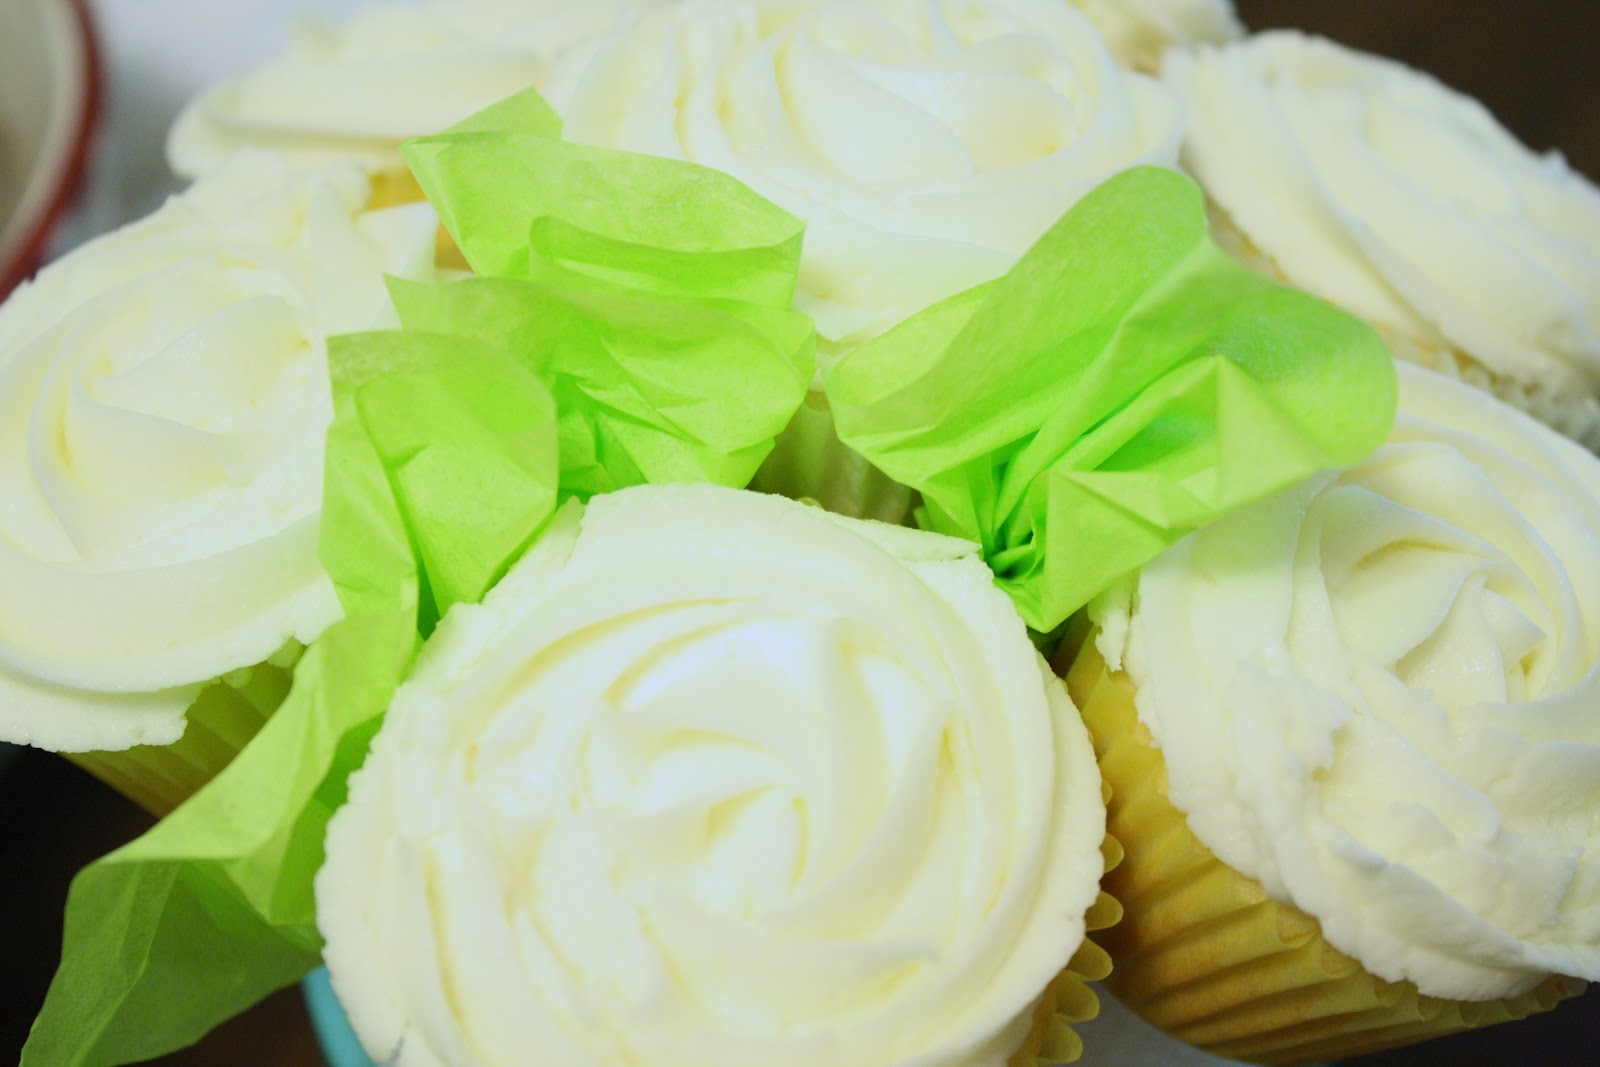
How fun is this? A friend found this on Pinterest one day and asked if I would make it for her grandmother's birthday. It takes some time, but the results are SO worth it!


Start with cupcakes that have been decorated using a middle-to-outside swirl so that they resemble a flower. 


Insert a Styrofoam ball into a flower pot. There are several different sizes so I suggest taking your pot with you to test out which size works best. 


Insert toothpicks into the ball wherever you want the cupcakes to go. Here is a tip: leave your toothpicks pretty high. If you insert them too far, they will be too short and the cupcakes will slowly fall off. For some of the cupcakes I used three toothpicks.


Close up view of how the toothpicks should stand.


Once you have the cupcakes secure, cut strips of green tissue paper...


...then fold them accordion style at one end and insert between the cupcakes.


After the tissue paper was between all the cupcakes and all empty spaces were filled,  I then used a glue gun to secure some pieces around the outside edges to hide any of the ball that might be showing. Then I glued a white ribbon around the base of the ball in order to have a clean edge.  (I apologize I did not get any action or close up shots of this.)


What's better than flowers and cake? Both! This cupcake bouquet is sure to make anyone's day over-the-top special.


Pin It!

Thursday, June 7, 2012

How to: Flag Cupcake Toppers


If you're a regular around these parts you have seen various cupcakes with flags on top of them, like the ones up there and the ones over here. I once saw plastic versions of sports pendants on some cupcakes and realized, "Hey, I can make those cheaper than buying them, plus I can get the image I want!" 

These flags are a simple, yet fun and attractive addition to a cupcake. I am going to show you how I make them! Here's what you need:

~images printed in color
~scissors
~glue stick
~toothpicks, with pointed tips trimmed off


So, the first step is to find an image you like. (Google Images is where I search.) Copy and paste it into a Word document. Once you have pasted it, click on the image to enable size editing and drag it down to the size you want. I usually print it out just to make sure it is the size I need before I go any further. 

Once you have the size you want, copy that image, then space 7 times. (That white space in between each image will be wrapped around the toothpick and I have found that 7 spaces between them works perfectly.) Now, paste the image. Space 7 more times and paste another image. Repeat once more until you have a row of four. 

You are going to be folding two of these images around a toothpick to form the front and back of the flag. So if you have 12 cupcakes, you need 24 images. (I usually do a few extra though. Just in case I mess one up.) 

When you get your first row of images, copy that whole row and keep pasting it down the page until you get your desired number of images. (See my finished page above.) Copying and pasting by rows is much easier and less time consuming that doing one image at a time to fill the page.


Next, cut the images into pairs.


Trim the top and bottom of the images but leave the white space on the sides. Flip over and apply the glue. 


Then wrap around the toothpick, line up the images and press the white edge around the toothpick well. I use my fingernail to get it nice and tight. Also, I like to trim the pointed part off the toothpicks with scissors. I find that pointed tip makes it hard for the paper to adhere and fit as well as I like for it to. With it gone, the paper is flush with the top of the toothpick.

Finally, cut off the excess white space on the right of the flag.


And there you have it! A finished cupcake topper! These are my go-to when I just can't find the right embellishment. They are perfect for sports themed cupcakes, but would work for just about any theme. Have fun! And feel free to leave questions in the comments!

P.S. Tomorrow I will feature these in action!

Pin It!

Thursday, May 17, 2012

How to Pipe Carrots


I believe in cake mix.

I believe in store bought icing.

I believe in short cuts, as long as they don't skimp on taste or quality.

Some bakers would consider these statements blasphemy. That if you don't make a cake or icing from scratch you are breaking some kind of unspoken baker's code. 

I almost always use cake mixes. And every now and then, if a project doesn't call for a sturdy icing*, I use store bought. I work full time and have a toddler and husband to take care of, so some days I don't have time to make something totally from scratch. (I am sure you can relate.) It doesn't make the baking any less special. It still comes from the heart and it still has homemade touches. And I get just as many oooo's and ahhhh's in the end.

A friend of mine had a very special birthday and when I asked what kind of cake he would like, he requested carrot in a simple sheet form. I used Duncan Hines Decadent Classic Carrot Cake Mix.  It's not your normal bland carrot cake boxed mix. It comes with actual shredded carrots and raisins. It's most excellent.

Store bought icing can be a little thin, but for a sheet cake it works great. We all know cream cheese icing and carrot cake go together like Kathy Lee and Hoda. I am a fan of Pillsbury cream cheese icing. In fact, when I buy icing it's usually the one I choose. I have even had people request it saying, "Remember that cream cheese icing you used that time? I want that kind." (Take that, baker's code.)

Here's a trick when using store bought icing: whip it with an electric mixer for about a minute. It adds air to the icing which lightens it up, plus it almost doubles what you start with. It's a win win.

Since the cake and icing did not take as long as my usual endeavors, I wanted to do a bit of decorating. I had a carrot cupcake from Caramanda's a while back and there was a tiny carrot piped onto the top of it. It was adorable. I decided to try it out on this cake. 

I used two containers of icing for this cake, but reserved about a fourth of it for decorating. I tinted half of that reserved icing orange and the other half green.  I put a Wilton 67 leaf tip on the bag of green icing and a 12 tip on the orange. 

Wilton 67 Leaf Tip

Wilton 12 Round Tip

Let me preface all of this by saying, it is TREMENDOUSLY hard to photograph with one hand and pipe with the other. That is why there are not photographs of the whole process in action, AND why the pictures are not the best quality. My next step is to get a tripod and figure out the timer on my camera. I have a whole new appreciation for all my favorite food bloggers after this. You gals must have a third hand you're keeping under wraps.

So first, take the leaf tip and hold it at a 45 degree angle. Squeeze pretty hard and drag slowly so that you get a wide section of icing. Then, slow down the pressure to almost nothing and pull so that the icing forms into a point at the bottom.


Next, using the orange icing with the round tip, place the tip directly over the bottom pointed end of the leaf you just made. Again, apply a good amount of pressure and drag.


Once you get about that much orange icing, slow the pressure to almost nothing and slowly pull away to form the pointed end of the carrot.


It's that easy!! And what a cute addition to a carrot cake.

I piped that carrot at the wrong end of the leafy greens. The other carrots better not make fun of him.

Anyone on the receiving end of baked goods is going to feel extra special. He or she is not thinking about whether it took you 3 hours or  45 minutes to make that gift of food. They are simply thrilled that they were thought enough of for someone to go out of their way to cook for them. It really is the thought that counts. When you take the time to mix a batter, bake it and cover it with icing, you are telling someone that they are important and special to you. Ya know, cooking for others just may be the answer to world peace.

~~~~~~~~~~~~~~~~~

*Because store bought icing is a bit on the creamier side, I usually make my own icing for cupcakes or goods where the icing needs to stand up and stay in place. However, I have had luck with pre-made icing for frosting cupcakes by mixing in some powdered sugar to stiffen up the icing a bit.

Pin It!

Sunday, March 4, 2012

Go Make This Now!

I came across a video on You Tube of a woman making homemade non-stick baking "spray." It's a spread really, not a spray, but the idea is that it is supposed to replace baking sprays and work just as good as greasing and flouring your pans. 

I was pretty skeptical but I am here to tell you, I will NEVER grease and flour when baking again! This stuff is incredible! If that isn't enough, it is super cheap and easy to make and it lasts in your pantry indefinitely.

Here's the recipe:

With a hand mixer or blender, mix equal parts all-purpose flour, vegetable oil and vegetable shortening until smooth.

That's it!

I used my immersion/stick blender and it came out silky smooth. It has the consistency of sour cream.


To use, just spread inside the pan. In the video she uses a pastry brush, but I found that it left too thick of a coat. A little goes a long way.

Want to see how great it works?


This cake fell right out of the pan. Look how clean and smooth! Virtually crumb-free! And no more messy flour coating my beautifully baked caked.

I will never be caught baking without it!

Pin It!

Friday, February 17, 2012

Cupcake Swirls

I had some leftover batter from the mini cupcakes  so I made 6 standard ones to practice piping on later. Specifically, I wanted to try swirls with an extra large star tip. I LOVE the results from a large tip. So exaggerated and pretty.

I just got some new tips from Amazon, as well as some disposable pastry bags which I HIGHLY recommend.

I didn't even need a coupler to attach the tip since I wasn't planning on switching it out for another one later.  I just snipped off about two inches of the pastry bag, dropped the tip inside and slid it down into the end nice and snug. (I'll share more on this in a future post.)

Large closed star tip

It is really quite easy to pipe a swirl. My aunt Joanna had filled me in on some tips, no pun intended, and I thought I would show you the results. I used a closed star tip (shown above) this time around.

The first is your typical swirl design. Remember those curly Q doodles you used to draw as a kid? It's basically the same thing. 

To start, place your tip at the edge of the cupcake. 

Squeeze the bag and swirl around until you get to the center. 

Stop applying pressure and lift your piping bag straight up in the air to get that small decorative star of icing.
 
Starting from the outside and working in.

The second one is a rose type of swirl. It's done in a reverse fashion. 

This time, start right in the middle and swirl  around until you reach the outer edge. 

So simple with such pretty results!

Starting from the inside and working out.

With just the right tip, a disposable bag and some icing, you can turn out some very pretty cupcakes with little effort!

Pin It!

Tuesday, February 7, 2012

Practice, Practice, Practice

Mmmm...aluminum with Crisco. My favorite.

My aunt, Joanna, has been decorating cakes for as long as I can remember. She is self taught and does beautiful work. It's always a treat to see her latest creation! I asked her last week if she would be willing to teach me some basics next time I am in town. In the meantime, she suggested a great way to practice piping: shortening and an inverted cake pan. So genius! (Apparently, that is how cake decorator newbies are trained.) It's ideal for four reasons:

1. The consistency of the shortening mimics that of icing.
2. The cake pan gives the feel of decorating on an actual cake.
3. Perfectly good buttercream doesn't go to waste.
4. Neither does the shortening. Just scrape it from the pan and use it over and over.

So last night, I gave it a go. I did as Joanna instructed and dove right in, piping away, changing  out tips and free-handing just to see what kind of shapes I could make. The picture above was my fourth attempt. (If you like this "masterpiece," you should have seen the three before it!) Each time, I just tried to fill up all the empty space on the pan to get in as much practice as possible, not concerning myself with the design as a whole. It was about learning how to hold and maneuver the bag while getting a feel for what designs each of the tips can produce.

This was my first experiment with a piping bag and I found it to be so much fun. I am a big fan of this practice method because I could just clean my "canvas" and start over many times without the commitment of a finished cake that I wasn't happy with. Decorating is definitely a skill that requires practice and patience. I am incredibly eager to learn all I can and I can't wait to have a finished cake to post for you guys. Until then, lots of other fun and tasty baked goods will be keeping you company.

Next up, Ten Cup Cookies!

Pin It!