Friday, March 30, 2012

A State Divided Calls for Sugar


It's a BIG weekend in Kentucky. In fact, "BIG" just doesn't begin to describe it. It's pretty stinking MASSIVE. 

Forever rivals The University of Kentucky and The University of Louisville will face off in the Final Four NCAA basketball tournament this weekend. It is an absolutely monumental event and you can feel the tension and excitement in the air. ESPN is calling this game "bigger than the Super Bowl." Die hard fans are brawling in dialysis clinics, and police are gearing up for student celebrations in both Lexington and Louisville. This is an incredibly historical moment in basketball history and I am thrilled to be in the middle of it all!

This calls for cupcakes!


I really wanted to make both Louisville and Kentucky themed cupcakes and post them in a split screen fashion, but I just didn't have the time. So, Louisville fans, take no offense. As a friend of mine said on Facebook, "No matter what happens on Saturday, a team from Kentucky will play for the National Championship," and that's pretty cool. Though, my Alma Mater is UK so I am kind of partial.


GO CATS!!


Pin It!

Wednesday, March 28, 2012

No-Bake Peanut Butter Cookies


Are No-Bake Cookies just a southern thing? I follow A LOT of baking and cooking blogs and I have never heard mention of them. I have seen variations such as corn flake cookies made with corn syrup, but not the straight up, good old fashioned oat variety that uses just butter, sugar and peanut butter. That's not to say they're just a regional thing. If you are not from the south and grew up with these cookies, let me know.  My curiosity is killing me.

My mom made these cookies for my siblings and I growing up. They were a once a week thing in our house and, oh, such a treat.  Sometimes she would make them on a Sunday evening and they really made Mondays a lot easier to face. We often argued over who got to lick the spoon and pan. 

These are my go-to for a sweet fix. I ALWAYS have the ingredients on hand to make them because they are all baking basics. And guess what? You just change a couple of ingredients to make a chocolate version. Mmmm.....chocolate..... 

Let's make No-Bake Cookies!

Melt the butter and add brown sugar and milk. Whisk together and bring to a rolling boil. 

Now this is where things get tricky. If you don't boil the mixture long enough your cookies will never set and you will end up eating them with a spoon. Which really is not much of a problem in my opinion. But, it does make it impossible to store the leftovers. You would have to eat every single cookie right then. Again, not a negative thing in my book. 

This is a rolling boil:


Once you see this, set your timer for 2 minutes. When the timer goes off, remove the pan from heat.

Next add your peanut butter and vanilla. If you don't have one of these, get it now.


Ever try to measure out peanut butter, or some other sticky substance using a measuring cup? It sucks. I can never get all of the ingredient out of the cup with ease. And baking, people, is all about science so if a recipe calls for a cup of something, by golly, you better have a cup and not a bit less. 

This gadget makes life so much easier. Set the cup to the amount you need, pop in the peanut butter (I use a butter knife so I can slide it across the edge of the cup and remove any excess) and press the bottom up to release the ingredients into your bowl or pan. Easy peasy!

And look how hardly any peanut butter is left! Mainly just the bit around the edges because I was messy. And I AM a messy baker. That's why you don't see many action shots. My kitchen gets too embarrassing during the process. If child services were to come into my house in the midst of my baking, there would be raised eyebrows. 


So, stir in your peanut butter and vanilla until they are well incorporated. Next, add your oats and stir well. Drop by the spoonful onto aluminium foil. Or in my case, because I was out of foil, wax paper. 


My mom always used foil and I see why. The warmth of the cookies and the condensation it caused on the bottom of the wax paper made made it stick to my table a bit. Use foil. Much easier. 

I added some chocolate sprinkles for fun. I love sprinkles. They make me happy. I would dip anything I could in chocolate and cover it with sprinkles. It's just the way things should be. But what's better than chocolate AND sprinkles? Why, chocolate sprinkles of course! And as we all know, chocolate and peanut butter are like total BFF's.


And the best part? I don't have to fight anyone for this:

This, folks, is what it's all about.

It's all mine. Come to Mama. And it did. One second after I sat down my camera.

Peanut Butter No-Bake Cookies
1 stick butter, melted
1/2 cup milk
2 cups packed brown sugar
1/2 cup peanut butter
1 tsp. vanilla
3 cups oats


1. Add milk and sugar to melted butter. Bring to a rolling boil and continue to boil for 2 minutes.
2. Remove from heat. Stir in peanut butter and vanilla. Once incorporated, stir in oats.    
3. Drop by the spoonful onto a sheet of foil and allow to set. 

Chocolate No-Bake Cookies
1 stick butter, melted
1/2 cup milk
2 cups white sugar
2 rounded tablespoons cocoa
1/2 cup peanut butter
1 tsp vanilla
3 cups oats


Follow the same directions as the peanut butter cookies, adding in the cocoa during the first step. 


Happy NO baking!

Pin It!

Sunday, March 25, 2012

Spring is Here!

I finally know what I want to be when I grow up. A food photographer. 

I simply adore taking pictures of food. Especially when the food is as darling as these spring inspired cupcakes I made. 

These cupcakes make me happy! The plump swirl of yellow icing against the purple cake. The pastel colored sprinkles. I am still learning, so I was so excited at how pretty they turned out. 

If you stare too long you will suffer from cuteness overload. You have been warned.

I mean, seriously. I just want to pinch their little icing cheeks. 


Yes, I realize all of the pictures look pretty much the same but I am telling you, I could NOT stop clicking that shutter button. I wanted to get every possible angle as to not miss each cupcake's good side.


I think I ended up with about 50 shots in all. It was super hard to choose who made the cut for this post. Tears of disappointment were shed. Hopes were smashed. But at least they still have their looks.

And their taste. This buttercream icing is to DIE for. Really. You could die if you eat too much. It's all butter. But it's SO sinfully delicious.

These cupcakes have a lot going for them, that's for sure. The ones who did not get featured here will make it in the big time just fine.*


This little guy even stripped down to his bare cake for me. Naughty, I know. But it's all for the art.

Happy Spring! And Go Cats!

*I am sad to report that there were 24 cupcake casualties last night as the result of our friend Shannon's birthday. They were survived by a small amount of yellow buttercream in a pastry bag on my counter. May they rest in our stomachs.

Pin It!

Saturday, March 24, 2012

Minnie Mouse Cupcakes

My friend Rebecca and I were both art majors in college so we had several classes together. I don't know what I would have done without her in my introductory sculpture class. Everyone dreaded that class (due mainly to the large block of plaster we had to carve) and having Rebecca there made it so much less intimidating. Plus, she's a wonderful sculptor so it was a bonus to get to see her creations. 

In 2009 we found ourselves not only in the the same class again, but simultaneously pregnant with just a few months between us. It was so wonderful to share the experience of our first pregnancies together! 

Her little Ally is celebrating her 2nd birthday with a Minnie Mouse themed party today and Rebecca asked if I would bake the cupcakes. When she sent me a picture of  what she wanted I couldn't say no. She found an idea for Minnie Mouse cupcakes online and they looked so adorable and very simple! We decided that since we were both super busy this week, I would bake and frost the cupcakes, she would take care of the gathering the embellishments and together we would assemble them. 


I bought cupcake papers at Michael's in red with white polka dots to mimic Minnie's dress. I tinted the cupcakes pink, just for fun, then piped on white icing using and open star tip. 


Rebecca made bows out of red fondant and bought some mini Oreos. She and Ally came over and while our girls ate a snack we put the finishing touches on the cupcakes. 


Voila! It's like a little Minnie Mouse is hiding behind the icing. Such an easy process with incredibly cute results.

Ally, I hope you have a wonderful birthday!

Pin It!

Thursday, March 22, 2012

White Chocolate Peanut Butter Grahams

I love things dipped in chocolate. And just about ANYTHING can be dipped in chocolate. Chocolate covered bacon, anyone?  It's all the rage these days. It's next on my list of items to dip. Right after my daughter's chubby little legs and bite sized toes. They're just begging to be nibbled.

This past weekend we threw a baby shower for my sister. There was a candy table that included a cake and all sorts of fun treats such as some S'mores Pops that I made. They are the perfect go-to celebration treat. For anyone who might have missed the post on how to make them click here.


I was so happy with the results! I used paper straws (from Amazon) for the sticks and pink candy pearls (from Michael's) for the embellishments. 

My mom is not big marshmallow fan so for her I just spread peanut butter between the crackers. They were fabulous! Of course, peanut butter and chocolate go way back. Throwing the graham cracker in the mix makes them certifiably addictive.


Once a month, we have a birthday celebration at work. Everyone brings some sort of treat in honor of all of the birthdays for that month and we just graze all day long. There's sandwiches, sweets, dips, fruit and more. I don't even bring lunch on these days because with all that food, there's pretty much no point.

For this month's celebration, it hit me that I had all the ingredients to make the stick-less version of the peanut butter graham pops I made for my mom. Instead of using the large square graham crackers, I broke them in half and made smaller rectangle sandwiches, dipped them in chocolate and topped them with bright sprinkles.


They are so delicious for something so simple. If you want your peanut butter sweeter or not as sweet, just adjust the amount of sugar you add. This recipe has a lot of wiggle room. You can't mess it up.

White Chocolate Peanut Butter Grahams

1/2 box graham crackers
1 tray of white melting chocolate/bark
1/2 C peanut butter
1/4 C confectioner's sugar
sprinkles

1. Break the graham crackers in half (or quarters, depending on how they are packaged) so that they are the smaller rectangle size.

2. Using a hand mixer, beat the peanut butter and sugar for a couple of minutes until it's smooth and a bit fluffy.

3. Spread the peanut butter mixture onto half of the crackers and top each one off with another cracker to form a sandwich.

4. Melt the chocolate according to the package. Dip the sandwiches and as you lay each one on wax paper top it with sprinkles while the chocolate is still wet. Allow about a half hour to set. 


Enjoy! But be careful. It's very hard to eat just one.

Pin It!

Saturday, March 17, 2012

Happy St. Patrick's Day!

Someone's having a birthday!

I know the day is almost over, but I have been a busy bee today with another baby shower for my sister and a birthday cupcake project.

I hope everyone has had a great day so far and that the rest of it only gets better!

Pin It!

Thursday, March 15, 2012

Thin Mint Stuffed Brownies


I have mentioned the Oreo Stuffed Brownies several times. In fact, you are probably tired of me talking about them. I finally made them this weekend and I am here to tell you, they made time stand still. For a moment, I forgot my name. I finally knew what love was. I was complete. My mouth is watering as I type this.

Since my coworkers get to reap the benefits of the majority of my baking, I let Mr. Mac take that batch of treats to his work this time around. But only after we got our claws into them a good bit. They were a hit!

I still wanted to make something for my work buddies in honor of the upcoming St. Patrick's Holiday and it hit me that Thin Mints and green sprinkles could transform this brownie recipe into the ideal holiday delight.

I used the same recipe from Bridget at Bake at 350, but substituted the Thin Mints in place of the Oreos. Her brownie recipe ROCKS. Alone, without any cookies, it still packs a fudgy, chocolate punch that makes this girl melt. It will definitely be my go-to brownie recipe from now on. Bridget, you're my hero.

See the little Thin Mint treasures hiding in there? Ah, the pot of gold at the end of the rainbow.

Thin Mint Stuffed Brownies

1 cup dutch-process cocoa*
 1 tsp. coarse salt
1/2 tsp. baking powder
3/4 c. unsalted butter
2 cups sugar
1 TBSP vanilla
3 eggs, lightly beaten with a fork
1 cup unbleached, all-purpose flour
20-25 Thin Mints
1 tsp. corn syrup
1 tsp. water
sprinkles


1. Preheat oven to 350 and grease a 9 x 13 pan. I use the homemade non-stick spread for this.  

2. In a medium bowl, whisk together the cocoa, salt and baking soda.

3. In a medium sauce pan, melt the butter over medium-low heat. Stir in the sugar and cook until the mixture is hot, about 1-2 minutes. 

4. Remove from heat and stir in coca mixture until combined. Add the eggs and vanilla and stir until combined. Add the flour and stir until smooth. 

5. Pour half of the batter into your dish. Layer in the Thin Mints and drop the remaining batter by spoonfuls over the cookies. Spread gently with an offset spatula.

6. Bake about 25 minutes until done.

7. Mix corn syrup and water in a small bowl. After the brownies have cooled for about 10 minutes, apply the corn syrup mixture with a pastry brush, then apply sprinkles.

8. Make sure the brownies have completely cooled before cutting. To make the process even smoother, place them in the freezer for about a half an hour beforehand.

*Bridget suggested using dark cocoa. Hershey's makes a Special Dark cocoa, but my grocery store doesn't carry it. I am sure this recipe would be even more exceptional with it. If any of my local buddies find it, let me know!


Happy, early St. Patrick's day!

Pin It!

Tuesday, March 13, 2012

Duncan Hines Frosting Creations


While searching for a cake recipe today, I came across an advertisement for new Duncan Hines Frosting Creations and I am super intrigued. The concept is a base white frosting that can be mixed with an ingredient pouch to make the flavor of your choosing. The flavors range from Caramel, to Bubble Gum to White Chocolate Raspberry.

They seem really fun! Check out their site as well as a video here.

What do you think? Will you be trying Frosting Creations?


Pin It!

Saturday, March 10, 2012

So Much Time, So Little To Do...


My baby is with her grandparents today and staying until tomorrow. I know they are having so much fun, but boy am I a bit lost without her! I needed a project. 

I have been promising my friend Amy some cupcakes for a month now. I remembered that I had some extra ones in the freezer as well as a significant amount of leftover frosting from the baby shower cupcakes, so I decided to break them out and play. 

A while back I read a tutorial by Kate on Our Best Bites demonstrating how to swirl different colors of icing together. I have been dying to give it a shot. It is super fun and I am hooked! Her technique makes swirling colors SO much easier than trying to maneuver two different colors of icing into one pastry bag. Plus, it was less mess than the traditional method. 


Amy loves pink. My bridesmaids wore lime green, strapless, knee-length dresses and carried pink hydrangeas so I decided to go with that color combination. Red and green are complementary colors so they, and any other shades in their families, pair well with one another. Aren't they fun?!

Because Our Best Bites explains the process of swirling colored icing so perfectly, I didn't attempt to break it down on my own. But I will tell you, all you need is three pastry bags, a large coupler*, a large tip of your choice and two different colored icings. If you are feeling really ambitious, Kate says you can do three or even four colors. To check out their great tutorial, click here. Stay a bit and peruse their site. It's one of my favorites!


What to do next? I see Oreo Stuffed Brownies in my future....

*If you don't have a large coupler, I bet you could get away with the tip technique I mentioned in my last post. 

Pin It!

Thursday, March 8, 2012

White Cake with Strawberries

Who doesn't love the phrase "Free Cake?"

I have been hankering to make and decorate a cake lately since I finally have all the tips and equipment. I really just wanted to get some creativity out of my system and also get in some practice. My plan was to take the cake to work. Since I know several people are watching their figures these days, I went with something a bit more light.

I used a boxed mix for a white cake and followed the directions using eggs whites. I moistened the layers with a lemon simple syrup, layered strawberries in between and put icing only on the outside of the cake. It really made for a lighter but tasty recipe. My coworkers loved it!

While the cake was baking, I made the lemon simple syrup. It is a recipe from Martha Stewart and it is SO "simple" and delicious. Simple syrup is used for many things and bakers often use it to lightly dampen the layers of a cake before assembling it. (I used some of the leftover syrup to sweeten my tea.) It gives great flavor and keeps the cake super moist.

Lemon Simple Syrup


 Ingredients:
  • 2 cups sugar
  • Zest from 1 lemon, plus 3/4 cup fresh lemon juice

 Directions:

  1. Heat sugar, zest, and 2 cups water in a small saucepan over medium-high heat, stirring, until sugar has dissolved. Bring to a boil. Pour through a fine sieve* into a medium bowl; discard solids. Let cool completely. Stir in lemon juice. Syrup can be refrigerated, airtight, up to 1 month.
*I don't own a fine sieve, so I laid a clean dish towel in my strainer and poured the mixture through it. 

Once the cake cooled, I leveled off the layers with a serrated knife and used a pastry brush to apply the syrup. I was afraid I would use too much syrup and as a result used too little. I would have liked a stronger flavor of lemon in the finished cake. I will have to research using simple syrup for cakes a bit more and, of course, practice will help.


Next, one layer at a time, I piped a ring of buttercream around the edge to act as a sort of dam for the strawberries. I didn't want the juices from the strawberries to seep out into the icing on the sides of the cake. I sliced the strawberries super thin and arranged them all pretty like. I love the contrast of colors in the picture above. It calms me. Ahhhhh.......

Okay, side note. If you ever have to slice a lot of strawberries, I have a handy tool for you. I am a creature of consistency and the old-school thought that if something worked for my grandmother it will work for me, so I often laugh at modern day shortcuts. Ha, Ha, I say! But this, kids, is plenty worth it. 

Joie Simply Slice Strawberry Slicer

I found mine at Kroger on clearance for 2 bucks and bought it because I thought it was so cool, but was sure it would be one of those things that either wouldn't work or I would never use. I'm glad I was wrong. Click on the caption in the picture to order it from Amazon.

So back to the cake...

Once I had all the layers assembled, I iced the cake with a thin crumb coat of buttercream. I have said it before and will say it again: a crumb coat is necessary for a clean and finished looking cake. Plus, it causes me to swear less when I'm putting on the final coat of icing so it's good for everyone else around, too.


Since it was cold outside, I sat the cake (covered in my cake keeper) on our picnic table to set up for an hour or so.

Next, I put the thicker final coat of buttercream onto the cake and smoothed it out. This was tough. Again, I am pretty new to cake decorating AND I am an extreme perfectionist. Those two things sometimes work against each other. I wanted the icing the be incredibly smooth with no imperfections. Needless to say, that single coat of icing took me about an hour to get the way I wanted. Don't be like me. 


Finally, I piped the accents on with white and blue icing. Remember how I mentioned before that you don't necessarily need a coupler for piping? Simply use a disposable piping bag (the only ones I ever use), snip off the end of the bag and slide in your piping tip. If you know you will not need to change out your tip for any reason, this is the way to go.

A small icing spatula was used to create the detail on the sides.

And here's a look inside:


If you have any questions feel free to leave them in the comments!

Pin It!

Sunday, March 4, 2012

Go Make This Now!

I came across a video on You Tube of a woman making homemade non-stick baking "spray." It's a spread really, not a spray, but the idea is that it is supposed to replace baking sprays and work just as good as greasing and flouring your pans. 

I was pretty skeptical but I am here to tell you, I will NEVER grease and flour when baking again! This stuff is incredible! If that isn't enough, it is super cheap and easy to make and it lasts in your pantry indefinitely.

Here's the recipe:

With a hand mixer or blender, mix equal parts all-purpose flour, vegetable oil and vegetable shortening until smooth.

That's it!

I used my immersion/stick blender and it came out silky smooth. It has the consistency of sour cream.


To use, just spread inside the pan. In the video she uses a pastry brush, but I found that it left too thick of a coat. A little goes a long way.

Want to see how great it works?


This cake fell right out of the pan. Look how clean and smooth! Virtually crumb-free! And no more messy flour coating my beautifully baked caked.

I will never be caught baking without it!

Pin It!

Thursday, March 1, 2012

Baby Shower


Framed shower invitation and onsies hanging out looking cute.

Happy March 1st! Spring is right around the corner and I couldn't be happier!

My sister, Rebecca, is expecting her first child in April. It's SO exciting. My little one is going to have a cousin!

Sunday my other sister Theresa, Mom, and I, threw her a family baby shower. I say "family" because in a few weeks Theresa and I are throwing another shower just for Rebecca's friends. Our families are VERY large on both Mom's and Dad's sides so it works out better to have one just for them and one just for  friends.


Childhood pictures of the mom and dad to be along with the ultrasound of the newbie. And how about that cute baby banner?! Theresa's pretty crafty.


Theresa ordered the cake from a fabulous shop here in town. It's simple but oh so pretty. I inspected it pretty well to see how it was made and sometime in the future I want to try a version of it. It has such a smooth, clean finish that the perfectionist in me dies for. And that's all buttercream, except for the monogram. 


And did I mention it was super tasty?


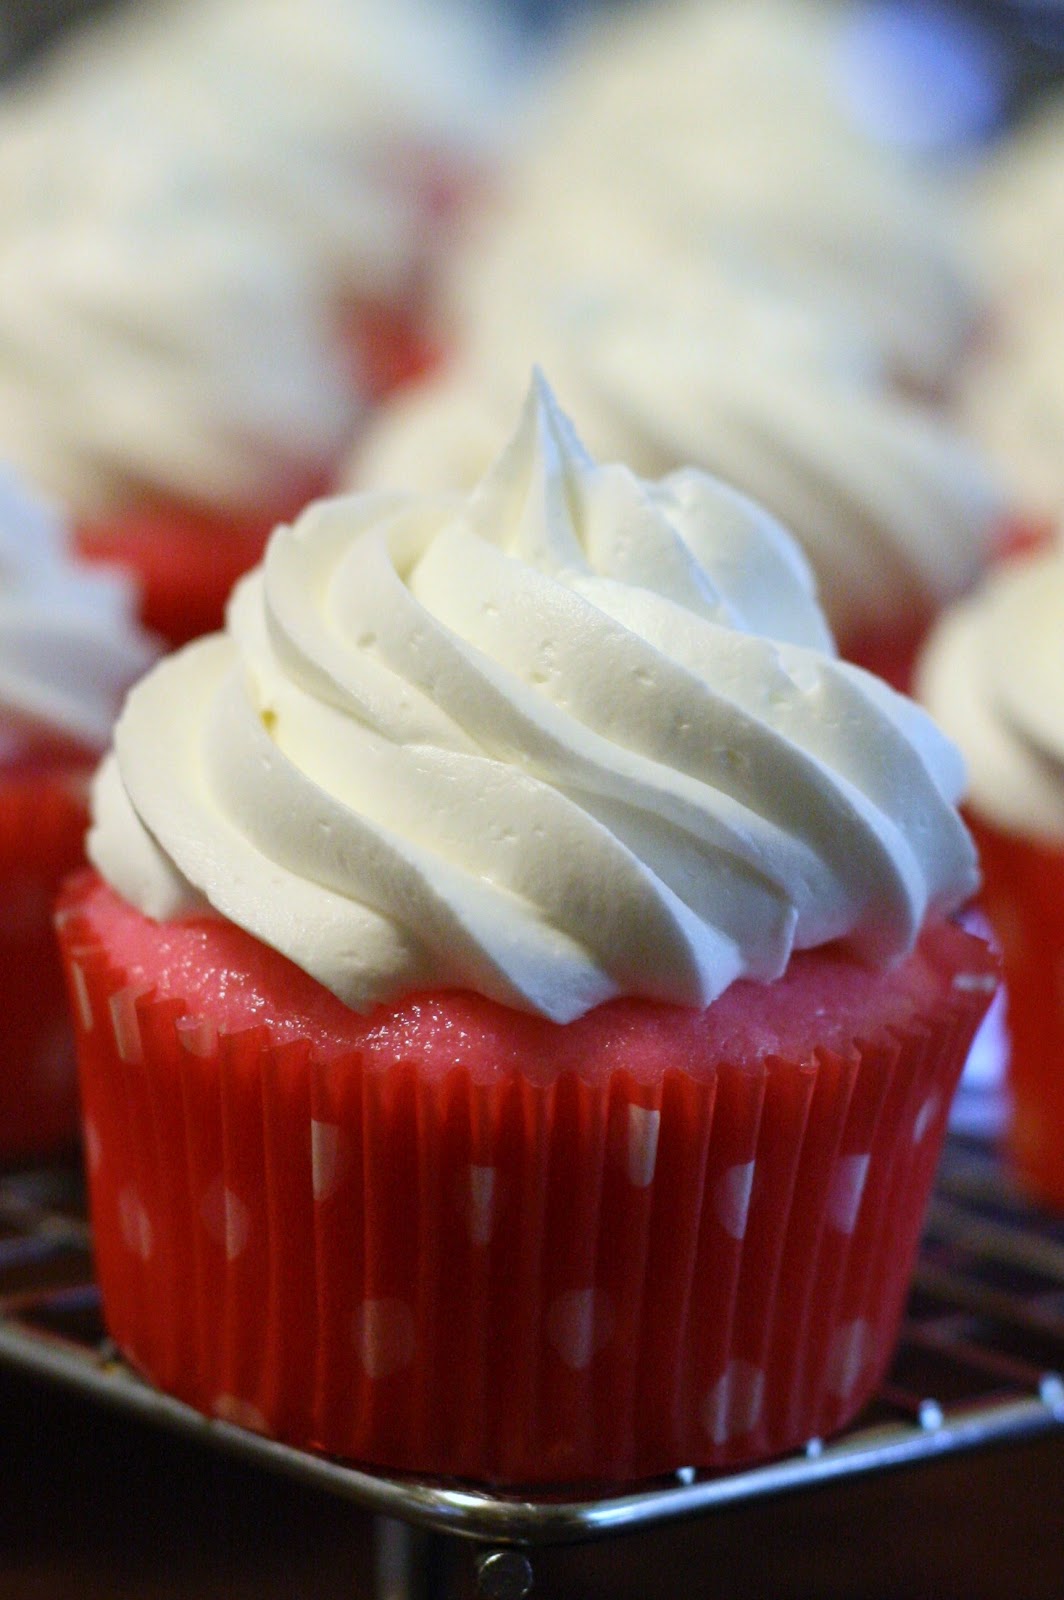
I made the cupcakes. They were white cake with my aunt Joanna's incredible buttercream frosting, topped off with a quartered strawberry. I will never use another buttercream recipe after making hers. It is fantastic. I will share it with you guys in the future.


I had a time with these puppies. I mentioned before that I was doing a trial run for an upcoming event. This was the event. The trial run went great! The actual run? Not so great. The first 50 I made fell for some reason that I have yet to figure out. We had unusually warm weather this weekend so I am guessing that was the issue? To top it off, the matte silver papers almost totally pulled away from the finished cakes just minutes out of the oven.

The recipe I used calls for sour cream and instant pudding and the results are a super moist cake. After reading on the internet that an especially moist cake can cause the papers to pull away, I ditched my recipe and went right to a boxed white cake mix. Since I only had enough silver papers to do half of the cakes, I bought Reynold foil papers for the rest.


The cakes came out great and didn't fall this time. I watched them for 3 hours to make sure the papers didn't pull away and sure enough, they stayed! I put them in the traveling containers since they were absolutely cooled, made my icing and packed it up as well for the trip to my hometown the next day. I planned on frosting them once I got there to make things easier on myself.

The next morning I started packing up the car. As I picked up the cupcake containers I noticed that the silver papers had pulled TOTALLY away from the cupcakes. It was as if someone had taken each one, pulled off the papers and sat the cakes back in them. The foil papers were still intact so at this point I knew that the silver papers were just no good. 

I was panicking. I have made cupcakes for years! Of all times for them to flop, this was the worst. After talking to my mom, we decided to just display the naked ones without papers instead of making a whole new batch. We improvised and hid them behind the foil dressed ones.

I was worried, but when one of my aunts saw them, she said she thought it had been done on purpose. My friend Amy declared it as genius. My aunt Joanna said they turned out beautiful. Way to stroke my ego, gals!


They actually look cute with no clothes on.


Here is a tip if you ever use fresh strawberries: Wait until the last possible second to embellish your cupcakes with them. Once they hit sugar, they automatically begin to macerate, which means they start to soften and release liquid. I waited until a half hour before the shower to top the cupcakes with the berries, but you can see in the above picture, the sugar in that icing got the juices running pretty quick.

Here are a few more goodies from the shower:


Fruit tray


Chicken Salad Croissants (My Mom's chicken salad is the best.)


Asparagus Roll Ups


 The Asparagus Roll Ups were a recipe from Theresa. They are divine!  Because Theresa mixed everything up and I mainly helped with assembly, I am not absolutely sure of the exact amounts of the ingredients. But after looking at other versions of the recipe online, this is pretty darn close:


Asparagus Roll Ups

12 slices of bread, crusts removed
24 asparagus spears with the tough ends cut off
8 oz. packaged cream cheese, softened
2 T. green onions, chopped
1 pkg bacon, cooked and crumbled
blue cheese
Parmesan cheese
3 T. melted butter

Roll the bread flat with a rolling pin.

Mix together the cream cheese and onions. Spread on the bread. Sprinkle on some of the crumbled bacon. (I am sure you could also mix the bacon in with the cream cheese and onion mixture to make things a bit easier.)

Lay 2 spears of the asparagus diagonal on the bread. Our spears were quite large so we only used 1  per roll up instead of 2. Also, because they were large we blanched them beforehand. 

Sprinkle over a good amount of Parmesan and a bit of Blue cheese. Fold the bread over the asparagus forming a triangle. Press around the tips of the bread together to seal them a bit.

Brush the top of eh bread with the melted butter and bake for 10-15 minutes at 425 degrees, or until the bread starts to brown.

I can't wait to make these myself. They were phenomenal!


All in all, the shower went off without a hitch. Rebecca got a lot of wonderful gifts. We got to see family, eat good food and I took lots of pictures with my new lens. (Yes, it arrived on Friday!)

The Friend shower is this month. I am making a special treat for it that I am very excited about! I don't want to ruin the surprise for my sister so I can't say what it is now. But no worries. I will have another full post on that shower as well!


Pin It!